Showing posts with label house. Show all posts

Saturday, December 12, 2015

A new helper comes to live with us.

Leaving my current job for my new job meant an end to free printing.  For years I've forwarded documents to myself and printed them at school. I barely made it two months before I broke down and bought us this printer.  This is a black and white wireless laser printer which I'm quite excited about mostly because it's not an inkjet printer.  I loathe inkjet printers, both professionally (I used to have to order all the replacement ink at school) and personally.  Hopefully this laser printer will serve us well.

I printed a note for Matt using the new printer. It encouraged him to set up his computers to print to this printer also.  Because printing wirelessly is almost as cool as Channing Tatum.


Monday, July 20, 2015

The list has been completed.

Back on May 21, 2007, I posted a list of project priorities.  This was so long ago, it appears on the stub of a blog that was the precursor to this one.  At the time, we had owned our house for a little over a month.

[Here we pause while I read back over other posts like this one, about our previous apartment.]

For the new house, I typed up the list of prioritized projects and taped it to the wall and began chipping away at them.

I'm here to report that with the removal of the white dresser, and the instillation of the Billy bookcases, the list has been completed!  It only took 8 years.

Things have changed since I made up the list.  We no longer have a bedroom and an office, for instance, as each of us has our own bedrooms. In the pantry area the first priority (scoring 100%) was the black shelf that I eventually decided I didn't like very much and it went out on the curb.  Some projects never came to fruition, like "shelves, great room, stairwell."  At one time I thought I would put floating shelves there, but the space is occupied by mirrors.

But there was a lot of work that went into completing that list and it feels good to have it done.

Saturday, June 20, 2015

Finished the Morliden doors for the Billy bookshelves

You may recall that I ran out of time with this project.  But today, we will finish.

Here is the full effect.

And here it is as you come through the door.
Unfortunately, I'm not thrilled with the end product.  A lot of time was spent picking the material, but I think our choice ended up being too busy.  I would like to redo them in a more solid color, or a batik, but that will have to wait until an unknown point in the future.  In the meantime, I will be happy that the shelves are closed off behind glass.

Saturday, June 13, 2015

Morliden Doors for Billy Bookcase part I

With Julie's assistance, I have purchased fabric for my Morliden glass doors from Ikea.  This means I am close to finishing my bookcase project.

Here I measure the fabric for insertion behind the glass panel.

Some of my tools.  Super cool see-through ruler bought as part of the Pattern Manipulation Class at PCC this spring.  Also, clover marking pen which is the best marking pen I've ever purchased.

I only finished three before it was time for our date.  So here are the results mid-project.

Monday, May 25, 2015

The finished-for-now product

No longer do you see the white dresser when you come in.  Now you see bookcases.

My plan was to have two bookcases with glass doors and one without, but I've changed my mind and all three need to have glass doors. The doors I bought can be customized with panels of material and after installing one set of doors, I concluded that it will be easier to customize before the doors are installed.  So instillation of the other two sets of doors has been put on hold.
Even though Billy and I didn't get along at the beginning, I'm happy to have embarked on this project.

Sunday, May 24, 2015

Mind blown. Sometimes you have a trapezoid instead of a rectangle.

Cutting three-quarters of an inch off the bottom of the bookcases fixed the height problem.  But as I was installing them I noticed something.  The first shelf went in and one side went further back than the other.  I did some exploratory pushing and things didn't even out.  So I kept on keeping on, which is often what I do when confused during projects. 

The next bookshelf had the same problem, but the amount of space covered kept getting bigger.  "Maybe this back part isn't square?" I mused.  Matt turned around, took one look and said, "nope.  There aren't two 90 degree angles on this end.

It took a while for my head to adjust, but these rulers prove it.  This end of the counter doesn't even measure 12 inches.  If you look at the other end, there is a silver 12-inch ruler that doesn't reach all the way across.  I've been living with a trapezoid and never noticed!

Here you can see how my trapezoid shrinks.  I'm pretty sure this was intentional.  Maybe to make the transition from great room to hallway/kitchen less abrupt.

Saturday, May 23, 2015

New bookcases. Or: Billy attempts to defeat me.

Here is our "before" shot.  Since we moved in this has been a storage area with the white dresser holding a mish-mash of things, and the two orange stands holding books and music items.  There used to be a stereo system with large speakers there too.

I never like how the white dresser was the first thing people saw when they came in the door. So it's (finally) time for a change.

I bought these two stands in Somerville.  At the time, downtown Somerville had an unfinished furniture place. I bought this one first, and it was my computer desk for the iMac I briefly owned.  That was the iMac that taught me I'm not an Apple person.  I bought the second one to hold my TV/VCR combo and all my VHS movies.  They've been good little soldiers, but it is time for them to find new homes.

What I found when I moved the shelves.  A lot of dirt and the resting place for Antares' mice.

Now that I've moved everything out and scrubbed the floor, it's time to assemble the three Billy bookcases I purchased from Ikea.

And look!  One is nearly done.  

But alas, it is about 5/8th inch too high for where it needs to go.  I swear I measured.  But I guess not very well.

I set aside that problem and Sentinel came to help me assemble the Kallax shelving unit.

That went together quite nicely.  I dislike the cubes we choose to fill the Kallax shelving unit.  They remind me of a set of plastic end tables from my early 80s childhood.  Also, they seem quite fragile.  But they will work for now.

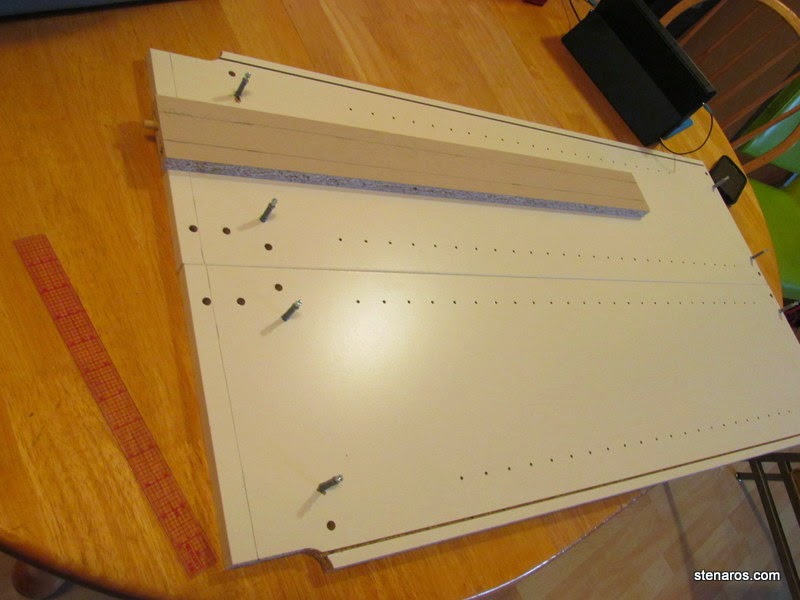
I returned to the problem of the Billy Bookshelves and measured out a solution.  The clear ruler I bought for my pattern manipulation class came in handy as I drew the line for the cuts I needed to make.

Taking another break, I filled some of the Kallax shelving unit's drawers.  Look what fits!  Albums!  I'm pretty sure some Ikea designer must have a big record collection.  Thank goodness s/he designed some furniture to hold them.

I am now the owner of a mid-range jigsaw.

All set up and ready to cut.
Stay tuned!

Monday, May 11, 2015

Recovering the new chair.

I stopped at an estate sale and fell for this chair.  After paying my $32.50, I went home, got the car and then convinced the chair and the car that they did want to come together so the chair could have a new home.  Sentinel is a fan of the new chair, though he wants it to face the other way so he can look out the window.

Sentinel continues to model the damage to the cushion.  The clever estate sale people flipped the cushion the other way so I couldn't see how bad this was.  Which is fine, I had to change the color anyway.

Antares also wanted to model.

I bought a twin sheet at Fred Meyer and used part of it to cover the bottom cushion.  Then I used the rest to drape around the back.  The whole thing came together in 15 minutes and will probably be fine until years go by and I get around to doing something official.

I bought a second sheet to drape over the official sheet, so I can easily wash away all the cat hair.  

Friday, January 2, 2015

And then there were none! Curtains: the finale

The shade was in a not-done state for many days because I needed to purchase the correct screws that actually wanted to go into the door, instead of weakly grasping at the edges of the hole.  Then, even after I obtained said screws, I put off doing this project.  But today is the day for finishing.  So the shade has been properly reinstalled.

Here you can see the newly installed shade cord, and the leather ties.  I used a button from an old, adored jacket as a stopper.

The shade in its raised position.

Oh yes, I installed a cleat too.  That also took no time at all.

Antares watched the whole operation carefully.

Sentinel just slept.

Before I could hang the curtains, I needed to patch the holes from where I installed the curtain rod incorrectly.  I purchased some cool stuff that sprays texture on your walls.  Here I test it on a different part of the wall where the texture rubbed away.  It was trickier than I thought it would be.  I needed the "fine" setting (not medium as I guessed from the picture) and it didn't really go on in the way I thought it would.  There were a couple of re-dos.

Here it is covering the holes.  I waited for it to dry and then painted over it.

And then I could finally install the curtains.

And they are a little short.  They don't quite cover the entire window when closed.  Which is why one should just make one's own curtains.  I'll probably get a roller shade.  I love roller shades.  But I will leave the curtains up.

Here they are in the open position.

I used this book a lot when eliminating all the blinds from the house.  It has a variety of window treatments you can utilize, the instructions are clear and I think I bought this for about $2.00.
Seven and a half years after we started, we can now consider the project of replacing all blinds complete.  Hooray!

Wednesday, December 31, 2014

Curtains: the middle part II

And after the ribbons were attached, there was the boredom of attaching 12 bird portraits & backing to the curtains.  It was tricky too, trying to maneuver all that material.  I did it, though.

Tuesday, December 30, 2014

Curtains: the middle

You know what's almost as boring as pressing?  Sewing 12 bird portraits to 12 backing squares. This has been a good reminder I'm not interested in the endless repetition that is quilting.


But I finished!  And then it was time to mark the curtains for the ribbon.  I used my trusty ruler and also Wonder Tape, you can see that white line along the top.  The Wonder Tape held the top of the ribbon in place so I could stitch it down with no trouble.  It was kind of awesome.

Sunday, December 28, 2014

Curtains! The beginning

Having cut the curtains to size, I prepared them for their grommets. 

I was worried that the curtains wouldn't hold the weight of the grommets very well, so I put a strip of blackout shade material between the two layers.

Spacing took some time.  I had a sheet of instructions from Fabric Depot, but I ended up using that as a guide and roughly guessing.  The grommets came with a template, and you can see where I have traced my circles.

It was the kind of work that involved a lot of attention (wouldn't want to cut in the wrong spot) but it wasn't very difficult. 

Here, you can see one finished curtain.  After cutting the holes, I just had to match a top part to a bottom part, and snap them together.

That done, I moved on to adding some flair to the curtains.  Which was the part I was most interested in, anyway.

I had leftover material from the shade, so my plan was to cut out the leftover birds and add them to the curtain, so things would blend better.  
Two observations.  The birds on the outer realms of the fabric--the shade was cut from the middle--are not as bright as the ones in the middle.  Second observation.  When I last visited Ikea, their textile department had disappeared, which was disappointing.

I had paper cutouts which I arranged in different ways before settling on this one.  You can also see the ribbon I will be sewing to the top and bottom of each curtain.

So the cutting of the birds commenced.  This ruler, which I think is meant for quilting, was invaluable. In fact, I use this ruler and the other one almost every time I sew. 

Should you be curious as to what brand of grommets I used, I have taken a picture of the packaging.

And so we begin pressing.  Four sides, on twelve squares.  It was a lot of pressing.  I listened to podcasts.

When I finished the birds, I still had to cut and press the backing for the bird pictures.  Four more sides, times twelve more squares equals more podcasts listened to.
And that was end of the sewing time today.